Why Your First Layer Is So Important
Almost every print failure traces back to the first layer. Bed leveling, Z-offset, and the checks that keep a print stuck to the plate.
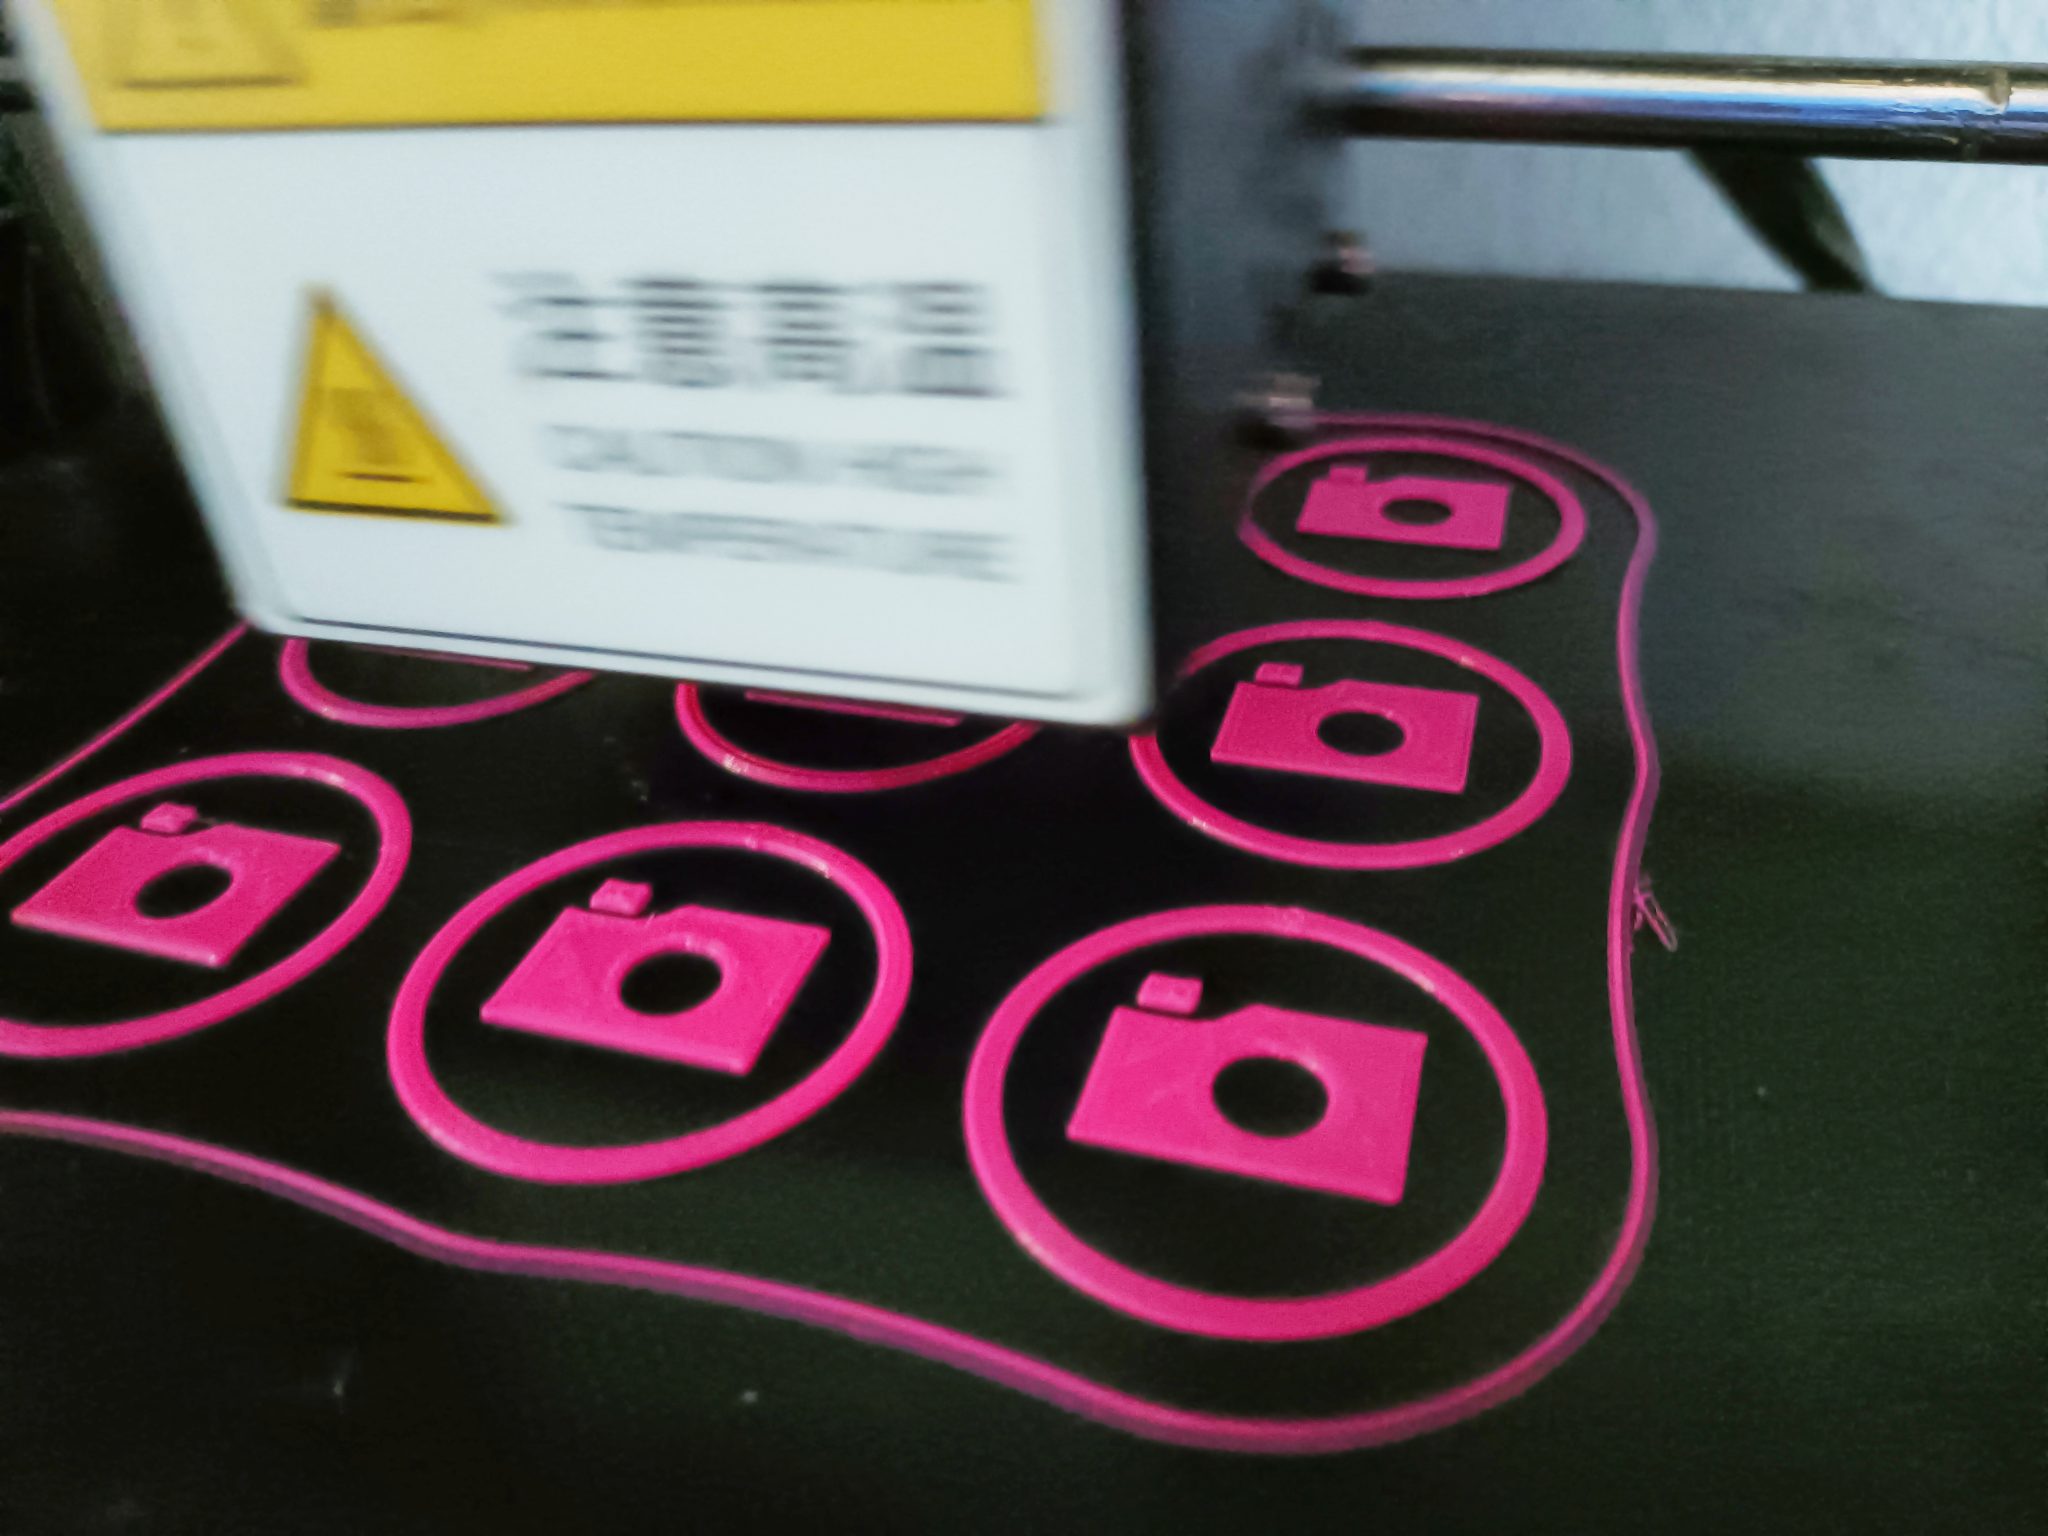
The first layer of a print is like the foundation of a house. If it isn’t stable, everything above it suffers. In FDM printing, the plastic has to stick to the bed and spread evenly, and when that first layer goes down wrong, the rest of the print usually follows.
A good first layer gives you:
- Adhesion: the model stays put instead of warping or lifting.
- Structural strength: a weak base leads to layer shifts and poor bonding higher up.
- Dimensional accuracy: it sets the footprint that every later layer stacks onto.
Common First Layer Problems
Here are the failures I see most often.
1. Poor bed adhesion
- Filament won’t stick to the plate.
- Edges lift off the plate (warping).
- The model detaches mid-print.
2. Wrong nozzle height
- Filament barely comes out or looks very thin (too close).
- Lines look thick or stringy (too far away).
3. Uneven extrusion
- Lines overlap.
- Blobby, rough texture.
- Gaps between lines.
4. Temperature problems
- Extruded filament curls up or lifts.
- Layers don’t bond to the bed or to each other.
Mastering the First Layer, Step by Step
Here’s how to get a perfect first layer whether you’re printing PLA, PETG, or anything else.
1. Level your bed (properly)
This matters more than any other setting. Most beginners think leveling is a one-time job, but it needs checking regularly, and there are two kinds: automatic, which most newer printers have, and manual, which is all older machines offer.
Automatic bed leveling:
- Open the printer menu and run auto bed leveling. The wording varies by brand.
- Run it regularly, or whenever you notice quality dropping off.
Manual bed leveling:
- Home the printer.
- Move the nozzle to each corner of the bed.
- Slide a piece of paper between the nozzle and the bed.
- Turn the knobs until you feel slight resistance on the paper.
Tip: repeat the whole process twice. Adjusting one corner moves the others.
2. Set the correct Z-offset
Z-offset decides how close the nozzle sits to the plate. Too high, and the filament won’t stick. Too low, and the nozzle scrapes or clogs.
Here’s a quick way to dial it in:
- Print a single-layer test pattern, like a square or a circle.
- Adjust the live Z-offset while it prints.
- Aim for slightly squished lines with no gaps and no over-flattening.
Good first-layer lines are smooth and consistent, slightly flattened with no gaps between them, and free of any filament curling up or getting dragged by the nozzle.
3. Choose the right build plate and clean it
Your bed material changes how well things stick.
- Smooth PEI: ideal for PLA and PETG, leaves a smooth finish on the bottom.
- Textured PEI: works for PLA, PETG, TPU, and ABS, leaves a textured finish.
How to clean PEI plates: dish soap and warm water strip the oils off. Don’t touch the plate with your fingers afterward, that just puts them back. For a quick clean, wipe it with isopropyl alcohol while the bed is cool, since IPA on a hot surface evaporates fast and can leave hazing. For stubborn marks, sand lightly with 1000–2000 grit.
4. Dial in the right temperatures
Temperature affects both adhesion and flow.
- Nozzle temperature: stay in the range for your filament. Running slightly hotter helps first-layer bonding, around 210–215°C for PLA.
- Bed temperature: PLA usually likes 55–60°C, PETG 70–80°C, ABS 100°C.
The fan can stay off for PLA and ABS on the first layer. PETG and TPU sometimes do better with light airflow, around 20%.
5. Slow down the first layer
Print the first layer slow and steady. Lower speed gives the plastic time to bond and settle.
Recommended starting points:
- First layer speed: 15–25 mm/s
- First layer height: 0.2 mm for a 0.4 mm nozzle, 0.3 mm at most
- First layer extrusion width: 120–150% for better bonding
6. Use adhesion helpers if you need them
- Glue stick: works for PLA, PETG, and ABS.
- Hairspray: a light coat helps with sticky materials like TPU.
7. Add a skirt, brim, or raft
- Skirt: outlines the print and primes the nozzle. Fine for almost everything.
- Brim: adds a perimeter around the base and fights warping.
- Raft: builds a whole platform underneath. Use it for large or stubborn prints.
If a print keeps starting with gaps or inconsistent flow, bumping the skirt loops to 3–5 can help before the model itself begins.
Final Thoughts
Getting the first layer right is the least glamorous part of 3D printing and probably the highest leverage. It costs patience and a couple of minutes of checking every so often, and it pays back in cleaner prints, fewer failures, and less wasted filament.
The short version: level the bed regularly, fine-tune the Z-offset, keep the plate clean, slow the first layer down, and get your temperatures right. If you’re still struggling after all that, it might be hardware, a worn nozzle, a bent bed, a failing sensor. In most cases, these steps are all it takes.
Happy printing! — Shivam Hegadi
Related articles
When to Use Brims, Rafts, or Skirts — and What Each Really Does
Brim, raft, or skirt? What each bed adhesion helper actually does, and which one your print needs, which is often none of them.
Print Layer Adhesion: How Temperature, Speed, and Cooling Interact
Layer adhesion is what holds a print together, and it comes down to three settings fighting each other: temperature, speed, and cooling. Here’s how to balance them.